This guide is for anyone building their first website on a Mac.
If you’ve made websites before, you can probably skip this one. But if you’re new to it all, stick around, by the end, you’ll know exactly how to design and publish a fully responsive website right from your Mac. Without writing a single line of code!
Building a website has never been easier, but with so many tools and services out there, it can be hard to know where to begin. This guide will walk you through everything you need to get started, from design to publishing, all using RapidWeaver Elements on macOS. Let's dive in…
Getting Started
When you’re ready to build your website, the good news is you can get started right away with Elements. Everything you need to design, edit, and preview your site runs natively on your Mac. There’s no complicated setup, no need for extra software, and definitely no terminal commands to worry about.
This is where RapidWeaver Elements comes in. It’s a modern Mac website builder that lets you visually design your site, add pages and content, and publish everything directly from macOS. Built on Tailwind CSS, it gives you full creative control without writing a single line of code.
While Elements takes care of the design and publishing side, there are two other things you’ll need before your website can go live: hosting and a custom domain name. Hosting is where your site’s files are stored and served from. Elements exports a static website, which means you can upload it to almost any hosting provider. Services like Netlify, GitHub Pages, and Cloudflare Pages are popular, reliable, and easy to use.
You’ll also need a domain name, this is the address people type in to find your site, such as realmsoftware.com. You can buy one from registrars like Namecheap, Porkbun, or Hover. Once your site is hosted, connecting your domain is usually just a few clicks away, and you’ll be ready to share your new website with the world.
Build a website on your Mac
Once you’ve got your hosting and domain ready, it’s time to start building. The great thing about RapidWeaver Elements is that everything happens right on your Mac, you can design, preview, and publish your entire website without switching between multiple apps or accounts.
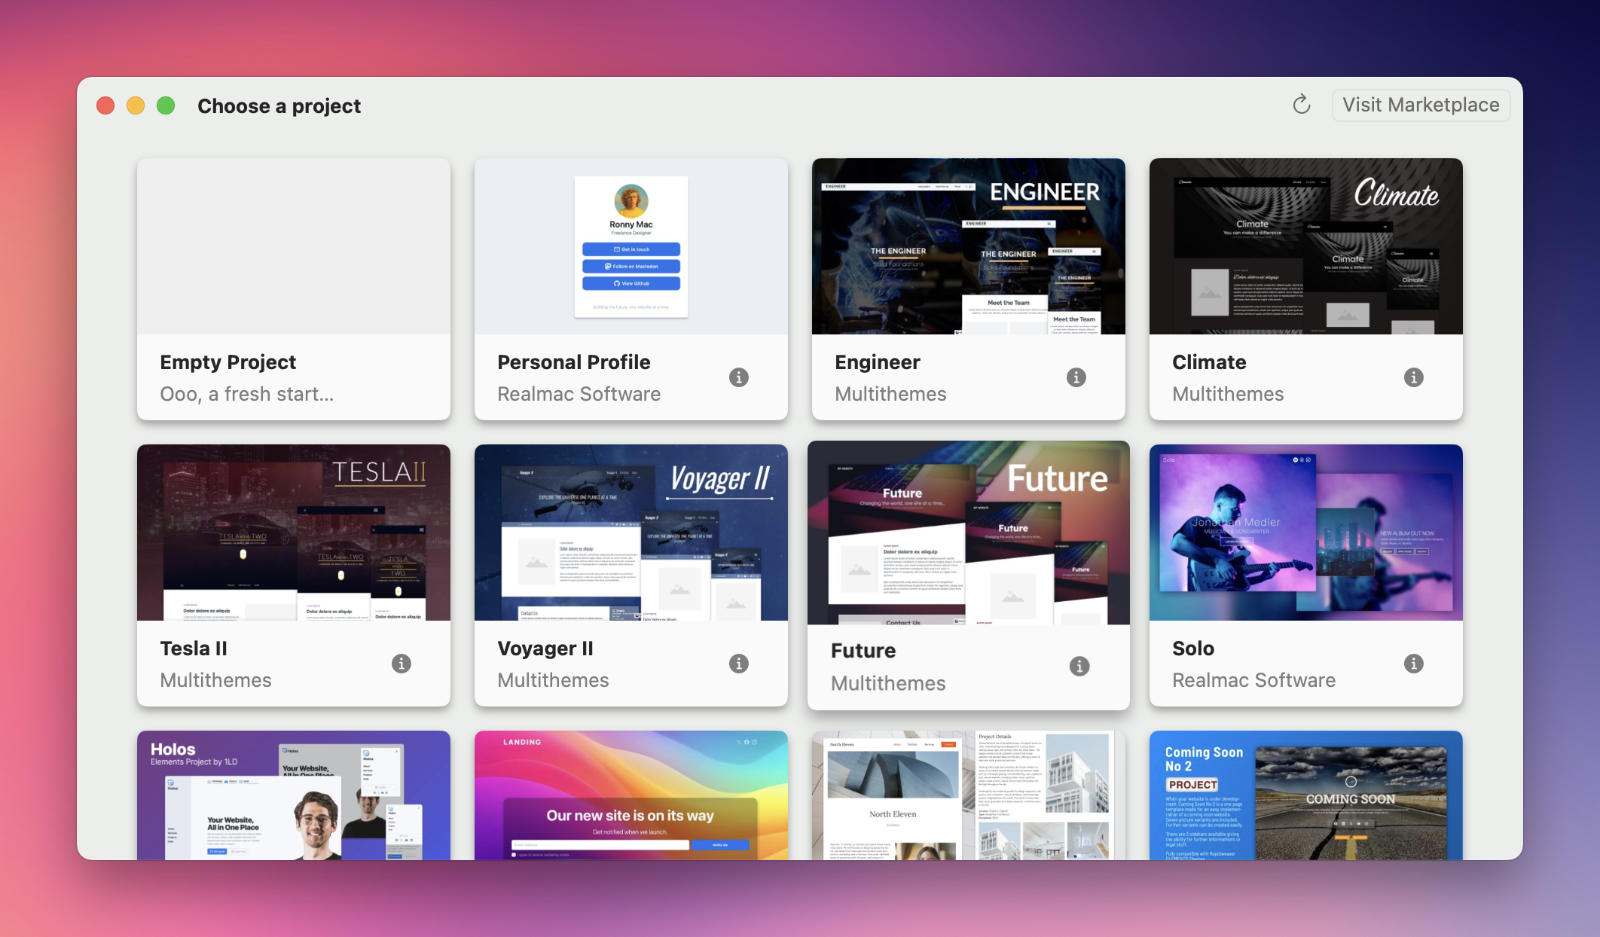
Launch Elements and press the "New Project" button in the Welcome Window, you will then see the project chooser window. To save time and get inspired, pick one of the pre-built projects included with Elements. There are options for portfolios, landing pages, blogs, agencies, more. Each template is fully editable, you can change colors, typography, layout, and images to match your style or brand. Watch the following video that's part of our official quickstart guide to see how this works in practice:
The video above should have given you a good idea on how Elements works, but if you want a full tour of the interface, you can watch the Elements Interface Tour video on YouTube.
Publishing Your Website
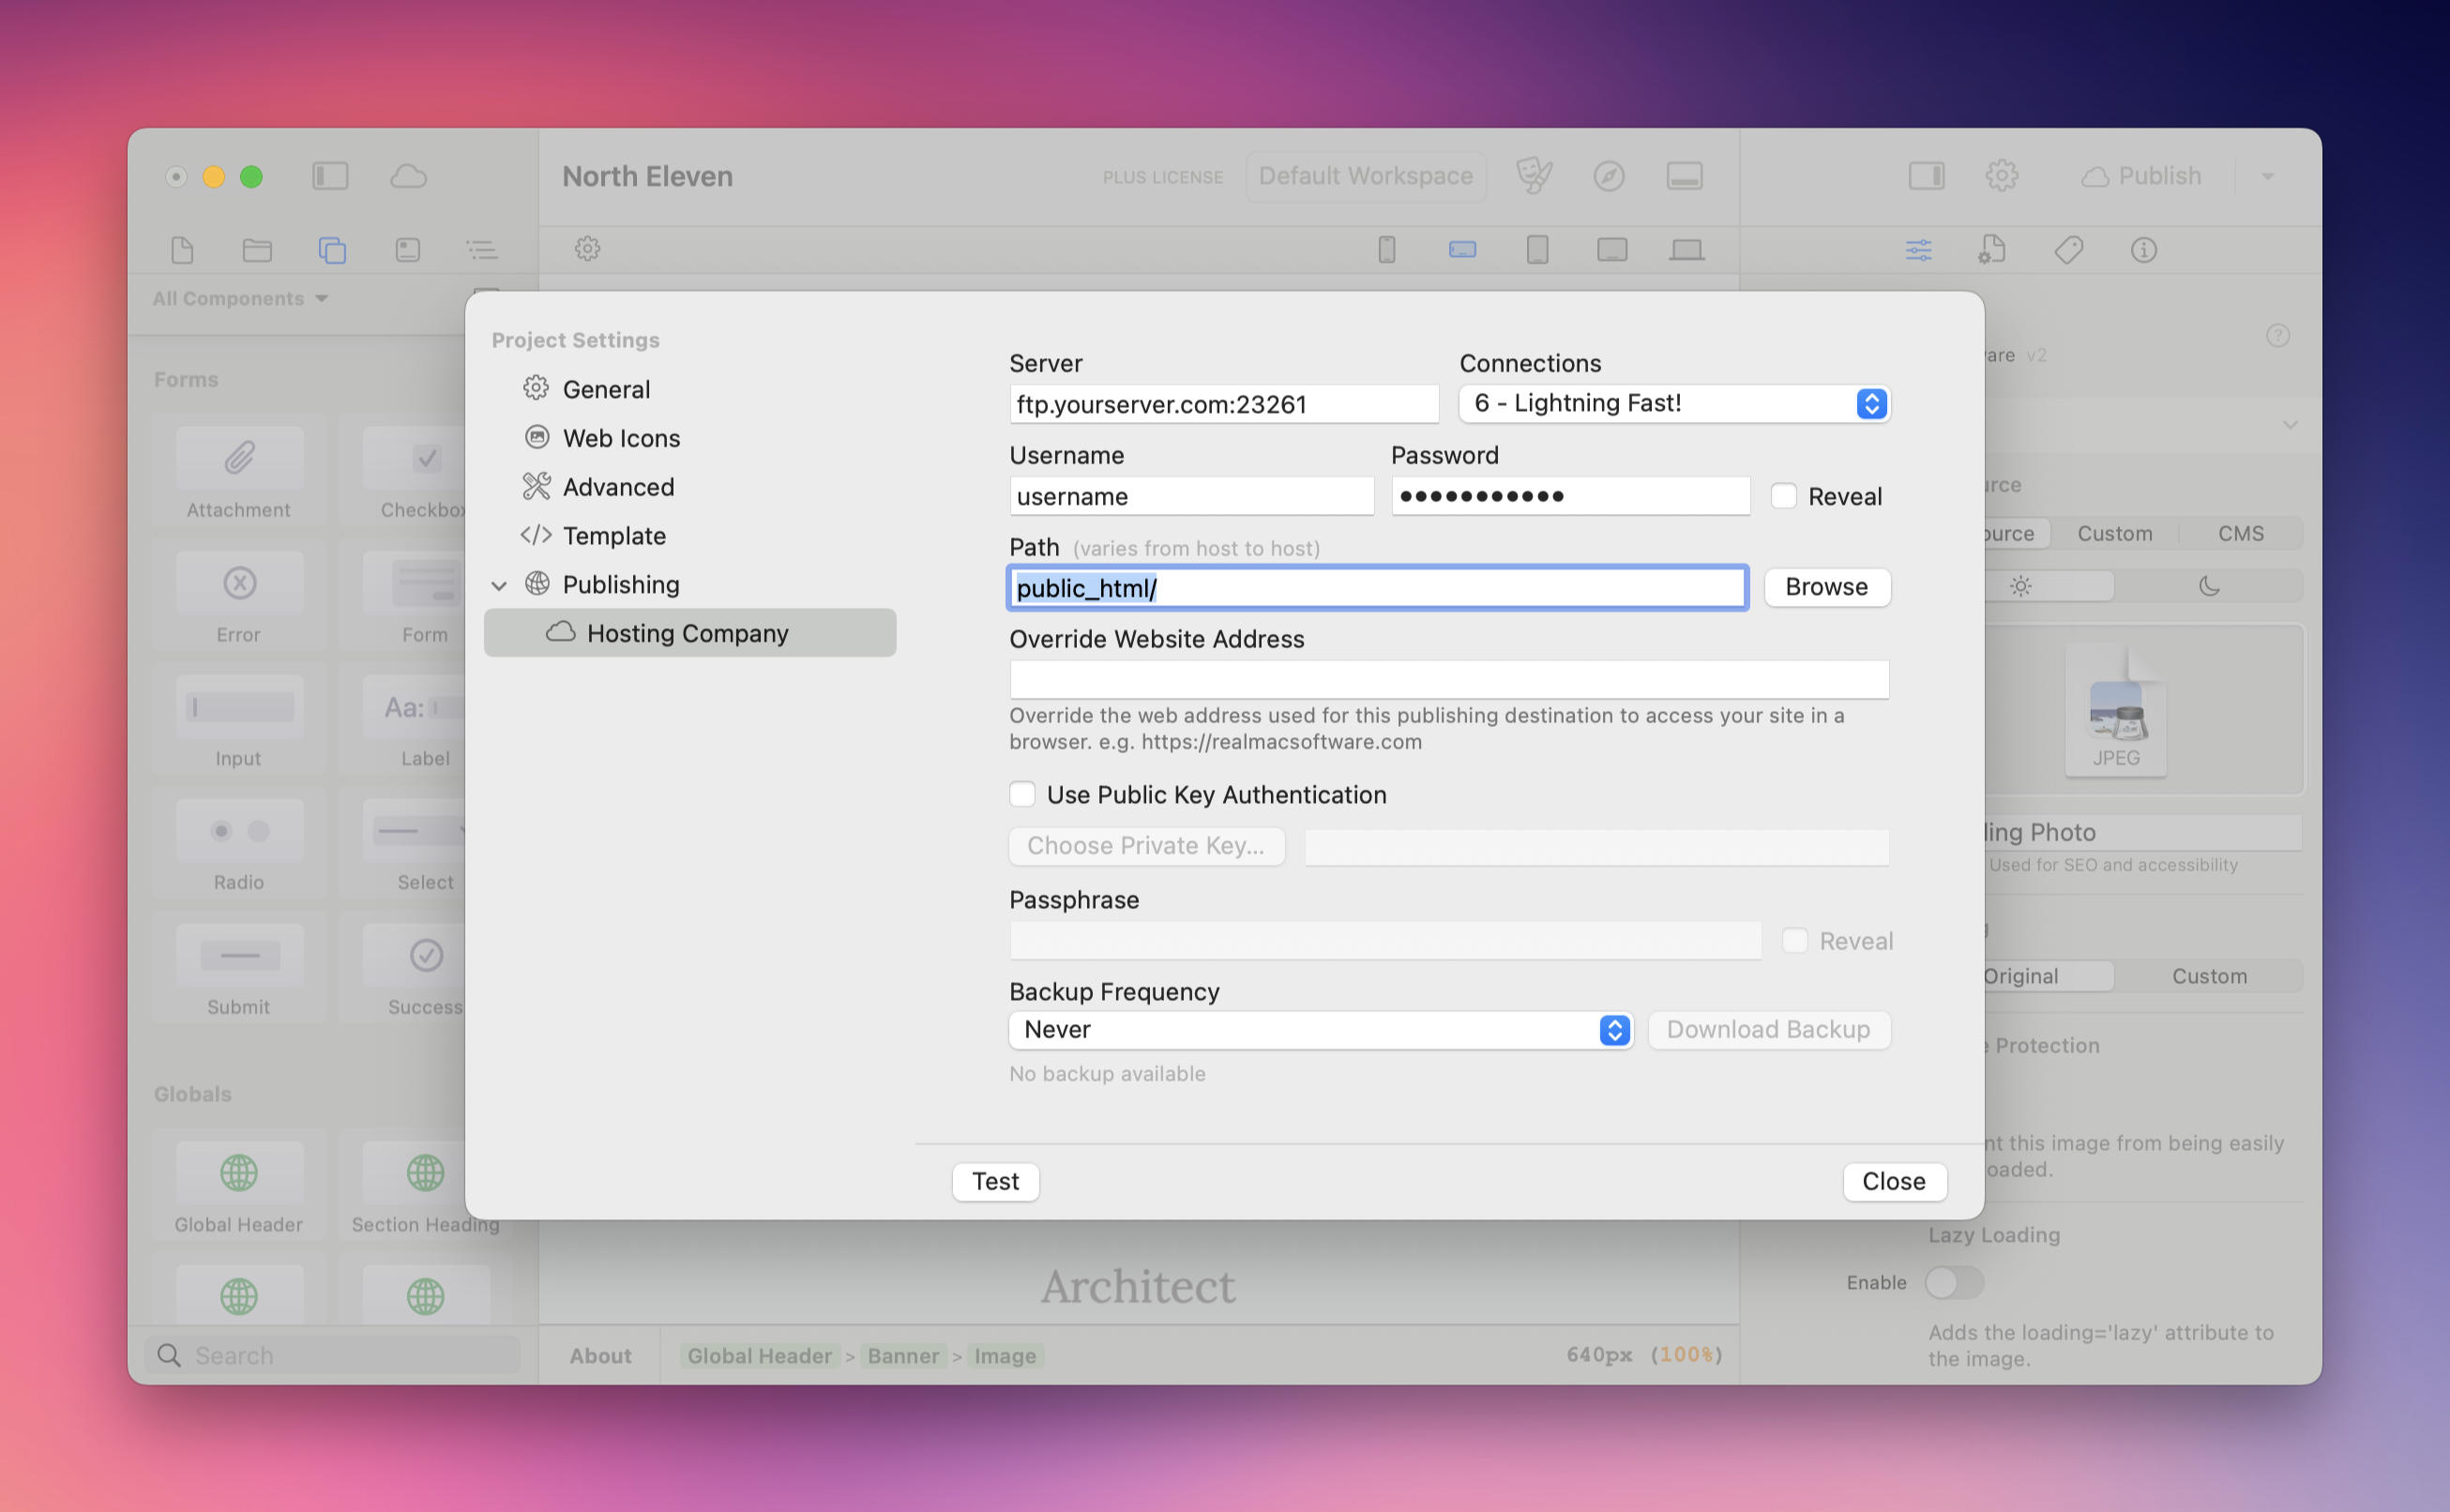
When you’re ready to share your site with the world, head to your Site Settings and open the Publishing section. Here, you can set up your publishing destination and choose how you’d like to upload your site.
Elements supports several publishing options, including local publishing (to a folder on your Mac) and direct uploads via FTP, SFTP, FTPS, or Amazon S3. Once everything is configured, publishing your site is just a click away — and seeing your work live in Safari is always a rewarding moment.
Depending on your hosting provider, you might need to adjust a few settings before your first publish. This is perfectly normal, as different hosts have slightly different requirements. The key thing to remember is that your publishing details come from your hosting provider, not Realmac Software.
Some providers use unique login credentials or server paths that differ from the details you use to access their control panel. This separation is intentional and helps keep your information secure. If you’re unsure about what to enter in Elements, reach out to your hosting provider’s support team. they’ll be able to provide the exact details you need.
Next Steps
Once your website is live, the fun really begins. You can keep improving it by adding new pages, refining your design, or connecting the Elements CMS if you want to build a blog (just like this one). As you grow more confident, try exploring advanced features like Globals and Custom Components to take your site even further.
If you ever get stuck, we’ve got you covered. Check out the full Elements Manual — it’s packed with helpful guides and videos to walk you through every feature. You can also drop by the Elements Forum to ask questions, get advice, or share what you’ve built with the community.
Building a website on your Mac with Elements is straightforward, powerful, and a lot of fun.

